
Quieting the Knock: Installing the Intelligent RV Water Pump Controller (IRVWPC2)
- Rivet3K

- Oct 28, 2025
- 3 min read
Updated: Nov 12, 2025

Tired of that loud knocking sound every time your RV water pump kicks on? Learn how to install the IRVWPC2 Intelligent RV Water Pump Controller to eliminate noise and improve water system performance.
Introduction
If you’re constantly annoyed by the loud knocking and hammering sounds coming from your RV’s water pump, there’s a smart fix worth your attention — the IRVWPC2. We recently installed one in our Airstream 22GT23FBT and the results were impressive. Below, we walk through our installation process, share a few lessons learned, and provide some tips that’ll make your install go much smoother.

About the Setup
On the 22GT23FBT, the water pump sits at the bottom of the wardrobe closet on the driver’s side. To reach it, you’ll need to remove both the wardrobe floor panel and the access panel directly below the door.
Note: The tight workspace is the hardest part of this installation. Everything else is straightforward once you can reach the pump.
Tips Before You Begin:
Remove both the wardrobe door and the lower access panel door to give yourself more working room. (How-to video link HERE)
Disconnect power before starting — manufacturer recommendation. Safety first.
Keep a towel or cloth handy to catch any residual water when disconnecting lines.
Step-by-Step IRVWPC2 Installation:
Step 1 – Review Installation Video
Recommend watching the manufacturer’s installation video first (link HERE). It clarifies orientation and wiring order.

Step 2 – Disconnect Fresh Water Inlet Hose
Use a 5/16” nut driver to remove the freshwater inlet hose and move it aside.
Tip: Add water to the fresh tank before disconnecting; you’ll need it later to test the pump.
Step 3 – Catch Residual Water
Place a shop towel or cloth under the outlet line to collect remaining water in the pump when the outlet line is disconnected.

Step 4 – Disconnect the Outlet (PEX) Line
Remove the outlet connector and set the line aside. The PEX tubing has enough flexibility to bend gently out of the way.
Step 5 – Install the IRVWPC2 Sensor
Thread the sensor onto the pump exactly as shown in the video. It’s a snug fit — ensure the connector stem ends up vertically if you winterize your trailer.

Step 6 – Reconnect Outlet Line
Reconnect the line to the IRVWPC sensor. Our 22GT23FBT had enough space between the pump and wardrobe wall to fit the sensor. If your installation situation does not, the kit comes with a steel braided hose and additional connectors to accommodate your specific situation.
Step 7 – Mount the Controller
Attach the IRVWPC2 control module to the wardrobe wall.

Tip: I replaced the supplied screws with Grip-Rite #8 × 1¼-inch yellow zinc interior wood screws.
Bonus: Drilling small pilot holes first makes installing the screws in the laminate wall a lot easier.
Step 8 – Connect the Wiring Harness
Use the included WAGO Compact Splicing Connectors to link the wiring harness to the pump and trailer wires. Match colors:
Black
White
Red
Yellow
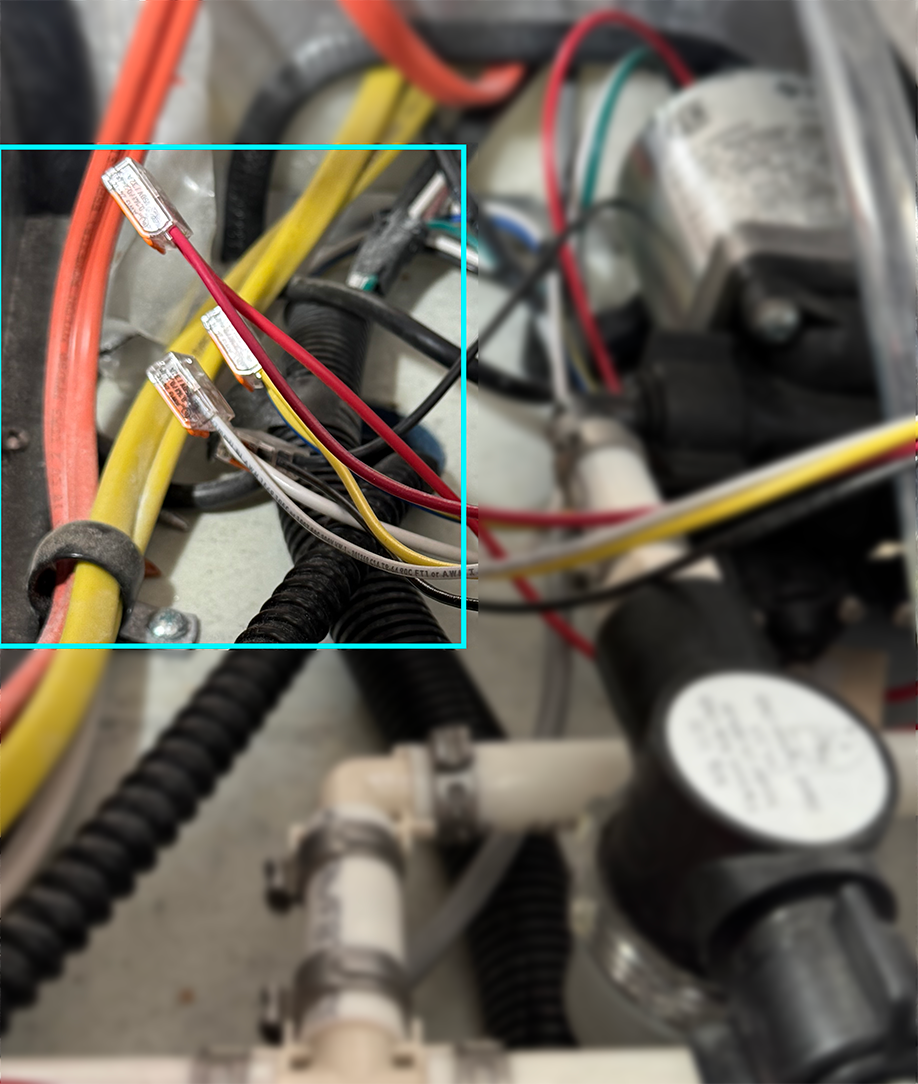
(Optional) Wrap black & red together and white & yellow together with electrical tape for a tidy finish.
Step 9 – Leak Check
Before connecting the sensor plug, run the pump briefly to ensure there are no leaks.
Step 10 – Final Connection
Attach the IRVWPC2 sensor plug, and your installation is complete!
Results & Takeaways
Installation took roughly an hour, most of which was spent working in the cramped wardrobe space. Once powered up, the difference was immediate — the knocking noise disappeared and the pump cycled more smoothly.
If you’ve been putting up with water pump racket, the IRVWPC2 is an affordable and effective upgrade that instantly improves cabin comfort and water system efficiency.
We’d love to hear your feedback—let us know if there’s anything we should add or clarify to make this summary more useful.


Comments